Hey there! I’m working with an AC motor controller supply business. Oftentimes, customers ask me about hookup an external sensor to an AC motor controller. No worries! I’m gonna share some tips here to make this process a breeze. AC Motor Controller

First things first, why do we even need to connect an external sensor to an AC motor controller? Well, sensors are like the motor’s super – smart helpers. They measure different things such as temperature, speed, torque, and vibration. By getting this real – time data, the motor controller can adjust the motor’s performance. For example, if the temperature sensor detects that the motor is getting too hot, the controller can reduce the power to prevent damage. It’s all about making the motor run more efficiently, reliably, and safely.
Now, let’s talk about the different types of sensors you might want to connect.
Temperature Sensors
Temperature sensors are super important. Motors generate heat when they run, and if it gets too hot, it can cause some serious problems like insulation breakdown or even motor failure. There are two common types: thermocouples and resistance temperature detectors (RTDs).
Thermocouples are pretty simple and cheap. They work based on the principle that when two different metals are joined together, they produce a voltage that changes with temperature. You can just attach the thermocouple to the motor housing or close to the windings. The output voltage needs to be connected to the input of the AC motor controller. Most modern controllers have an input channel that can handle thermocouple signals.
RTDs, on the other hand, are more accurate. They rely on the change in electrical resistance of a metal element as the temperature changes. They’re a bit more expensive but are great for applications where precise temperature measurement is crucial. When connecting an RTD to the motor controller, you need to make sure the controller has the right input configuration for the RTD type (e.g., 2 – wire, 3 – wire, or 4 – wire).
Speed Sensors
Speed sensors let the motor controller know how fast the motor is spinning. There are a few kinds out there. One popular type is the Hall – effect sensor. It uses the Hall effect to detect the magnetic field changes as the motor rotates. You can mount the Hall – effect sensor near a rotating magnetic target, like a toothed wheel or a magnet on the motor shaft. The sensor then sends a pulse signal to the controller, and the controller can calculate the motor speed based on the frequency of these pulses.
Another type is the encoder. Encoders can provide more detailed speed and position information. There are two main types: incremental encoders and absolute encoders. Incremental encoders output a series of pulses as the motor shaft rotates, and the number of pulses indicates the amount of rotation. Absolute encoders, on the other hand, can give the exact position of the shaft at any time. Connecting an encoder to the motor controller usually involves making sure the signal types (such as differential or single – ended) are compatible and that the wiring is correct.
Torque Sensors
Torque sensors measure the amount of torque (turning force) the motor is producing. They’re crucial in applications where precise control of the motor’s torque is needed, like in robotics or industrial machinery. There are strain – gauge – based torque sensors and non – contact torque sensors.
Strain – gauge torque sensors work by measuring the deformation of a mechanical element when torque is applied. The strain – gauges are bonded to this element, and the change in resistance due to the strain is measured. The output signal from the strain – gauges needs to be conditioned and then sent to the motor controller. Non – contact torque sensors, like those using magnetic or optical principles, are less intrusive and can be a good choice in some cases. The connection process for these sensors also depends on the specific signal output and the input requirements of the controller.
Vibration Sensors
Vibration sensors can detect abnormal vibrations in the motor. Excessive vibration can be a sign of problems like misalignment, imbalance, or bearing wear. Piezoelectric vibration sensors are commonly used. They generate an electrical charge proportional to the vibration they detect. When connecting a vibration sensor to the motor controller, you need to check the input impedance of the controller and make sure it’s compatible with the output of the sensor.
Okay, now that we’ve covered the types of sensors, let’s talk about the actual connection process.
Step 1: Check Compatibility
Before you start connecting anything, you need to make sure that the external sensor is compatible with your AC motor controller. Check the signal types (e.g., analog, digital), voltage levels, and communication protocols. For example, if your sensor outputs a 0 – 10V analog signal, your controller should have a corresponding analog input that can handle that voltage range.
Step 2: Power Supply
Most sensors need a power supply to work. You can either use the power supply provided by the motor controller (if it has a suitable output) or a separate power source. Make sure the power supply voltage and current ratings match the sensor’s requirements. Incorrect power supply can damage the sensor or cause inaccurate readings.
Step 3: Wiring
Proper wiring is crucial. Use the right gauge of wire to minimize signal loss and interference. Make sure to follow the wiring diagrams provided by both the sensor and the motor controller. Label your wires clearly to avoid confusion during installation and troubleshooting. Also, use shielded cables if possible, especially for sensors that are sensitive to electromagnetic interference (EMI), like analog sensors.
Step 4: Configuration
Once the sensor is physically connected, you need to configure the motor controller to recognize and use the sensor data. This usually involves setting up parameters such as the input type, scaling factors, and alarm thresholds. Refer to the user manual of your AC motor controller to do this correctly.
Step 5: Testing
After configuring, it’s time to test. Start the motor at a low speed and check if the sensor readings are correct. You can use a multimeter or other testing equipment to verify the sensor signals. If there are any issues, double – check your wiring, configuration, and compatibility.
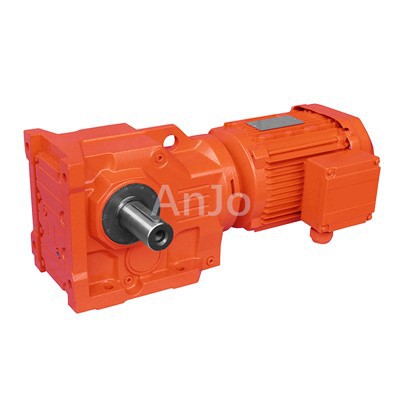
Connecting an external sensor to an AC motor controller might seem a bit daunting at first, but if you follow these steps and understand the basics of the sensors and the controller, it’s actually not that hard.
Stainless Steel Motor And here’s the deal: If you’re in the market for an AC motor controller or need more advice on sensor connections, we’re here to help. We’ve got a wide range of AC motor controllers that are designed to be user – friendly and compatible with various sensors. Just reach out for a chat about your specific needs, and we’ll work together to find the best solution for you.
References
- "Motor Handbook" by Arnold Tustin
- "Industrial Motor Control" by Thomas J. Gorman
- "Sensors and Actuators" textbooks from various engineering publishers
Hangzhou ANG Drive Co., Ltd.
We’re well-known as one of the leading ac motor controller manufacturers and suppliers in China, also support custom service. Please feel free to wholesale high quality ac motor controller made in China here from our factory. Contact us for more details.
Address: No.185, Jincheng Rd., Hangzhou 311202, China
E-mail: export6@angdrive.com
WebSite: https://www.angdrive.com/
