As a long-time motorcycle parts supplier with over a decade in the game, I’ve seen more broken bikes than I can count—from commuter scooters that took a pothole too fast to vintage cafe racers that sat neglected for years. One thing always stands out: most riders reach for a wrench to replace a part before even trying to repair it. But here’s the truth: many damaged parts aren’t as far gone as they look, and repairing them saves you cash, keeps old bikes on the road, and reduces waste in a space that’s too often quick to throw things away. I’m not a mechanic with a fancy shop degree, but I’ve helped countless customers fix damaged parts instead of buying new ones, and today I’m sharing the practical, science-backed tricks I’ve picked up along the way. Motorcycle Parts
First, let’s start with the basics: understanding what you’re actually dealing with before you grab tools. Not all damage is the same, and treating a cracked plastic fairing like a bent brake line is a fast way to make a bad situation worse. When you pull a part off your bike, take 10 minutes to inspect it under good light. For metal parts, look for bends, cracks, or corrosion—corrosion on steel parts, for example, is a big red flag because it doesn’t just stay on the surface; it eats through the material from the inside. For plastic parts, especially ABS or thermoplastic, feel for brittleness—if it crumbles when you press a small spot, it’s too far gone to repair. For rubber parts like hoses or seals, check for cracking, swelling, or flat spots—if a rubber hose has deep cracks along its length, replacement is usually the safer bet. Our team at the parts supplier gets dozens of calls a week from riders who want to repair parts that are beyond saving, so this step might feel tedious, but it saves you time and money later.
Let’s break down the most common damaged parts riders ask about, with step-by-step repairs that actually work. First up: cracked aluminum parts—think engine covers, foot pegs, or frame brackets. Aluminum is soft, but it’s strong for its weight, which makes it a go-to for modern bikes, but it cracks when it takes a hard impact. I’ve seen riders try super glue or epoxy for aluminum, and it almost always fails. The best method for small cracks (less than 2 inches) is TIG welding, but if you don’t have a welder at home, there’s a trick we recommend for small, non-load-bearing cracks: aluminum epoxy putty. Wait, not the off-the-shelf kind—you need a high-temperature epoxy rated for at least 300°F, because engine covers get hot. Here’s how to do it: first, clean the crack with isopropyl alcohol to remove oil and dirt, then use a wire brush to rough up the area around the crack so the epoxy has something to stick to. Mix the epoxy, press it firmly into the crack, and let it cure for 24 hours. We’ve sold thousands of these epoxies to customers who fixed their engine covers this way, and it lasts for years. For larger cracks or parts that hold pressure (like a coolant line), TIG welding is non-negotiable—bring it to a professional who specializes in aluminum, not just a regular welder, because aluminum needs a different heat setup than steel.
Next, plastic fairings and bodywork. Fairings take a beating—rocks, falls, minor crashes—and cracks are super common. The secret here is knowing what kind of plastic you’re dealing with. Most modern fairings are either ABS or polypropylene. ABS is rigid, so you can use plastic welding rods made for ABS, which melt and fuse the crack together. Polypropylene is flexible, so it needs a special polypropylene rod because regular ABS rod won’t stick. A lot of riders skip the prep, but that’s why their repairs break again. For plastic welding, start by drilling a tiny hole at the end of the crack to stop it from spreading—that’s a trick I learned from a veteran mechanic back when I first started in the parts business. Then, use a heat gun or plastic welder to melt the rod into the crack, smoothing it out so it’s flush with the fairing. If you don’t have a welder, you can use a two-part plastic adhesive designed for thermoplastics, but again, prep is key: sand the crack to rough it up, clean with acetone, and clamp the part while the adhesive cures. Pro tip: if the crack is on a load-bearing fairing mount (the part that connects to the bike’s frame), never use adhesive alone—reinforce the back with a small metal bracket cut from a thin aluminum sheet, which we sell as a low-cost accessory for exactly this.
Then there’s brake lines and hoses. Damaged brake lines are a big deal—failure is not an option. Small cuts or frays on rubber hoses can sometimes be repaired, but only if the damage is less than 10% of the hose’s circumference and not near the fittings. The correct repair here is a hose repair kit, which includes a ferrule and a compression nut. First, cut the damaged part out of the hose, slide the ferrule and nut onto the hose, then crimp the ferrule with a crimping tool to make a tight seal. Bleed the brakes afterward to make sure there’s no air in the line, which is a safety must. If the hose is bulging or has deep cracks, replace it—no exceptions. We get so many panicked calls from riders who tried to repair a bulging brake hose and ended up with a soft brake pedal, which is why I always emphasize safety first.
What about bent handlebars? Handlebars take a lot of stress, especially if you fall off the bike at low speed. A slightly bent handlebar can throw off your riding position, leading to hand and wrist pain, so fixing it is better than ignoring it. The key here is to straighten it, but do it without weakening the metal. First, remove the handlebars from the bike and the controls (grips, levers, mirrors). Then, clamp the bent part in a vise with soft jaws—never use hard metal jaws, because that will dent the bar and create a weak point. Use a pipe wrench or a bar of wood to apply gentle, even pressure to the bent area, turning it slowly until it’s straight. Stop periodically to check the bar for cracks—if you hear a creak or see a small crack, it’s time to replace the handlebar. Once it’s straight, sand the area smooth and touch up the paint to prevent rust. A lot of our customers do this and save $50 on a new handlebar, but if the bend is severe, replacement is safer.
Now, let’s talk about common mistakes riders make when repairing parts, because even a small error can turn a fix into a safety hazard. First, using household glues or adhesives on load-bearing parts—super glue isn’t strong enough for metal or plastic that’s under stress, and it will fail. Second, not accounting for material type: using steel epoxy on aluminum, or ABS rod on polypropylene, is a waste of time. Third, skipping prep work: a repair that’s not cleaned, sanded, and clamped will never hold. Fourth, ignoring safety: brake parts, tires, and suspension parts are critical—if you’re not sure about a repair, don’t risk it. Our parts team always advises customers to err on the side of caution, because we’d rather sell a new part that works than have someone get hurt.
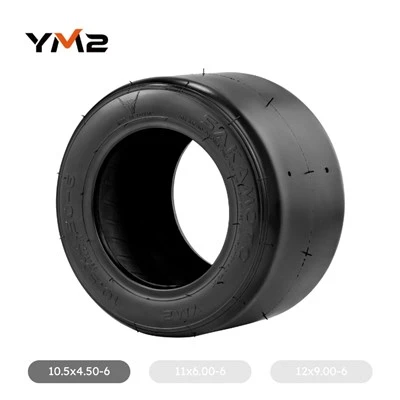
I also want to touch on parts that should never be repaired, no matter what. Tires, obviously—any puncture in a motorcycle tire that’s larger than a quarter-inch, or on the sidewall, means replacement, not repair. Brake rotors: if they’re warped or have deep grooves (more than 1mm), replace them, because resurfacing can weaken the rotor’s structure. Engine components like pistons, cylinders, and camshafts—if they’re scored or broken, repair is rarely successful, and it’s cheaper in the long run to buy a new or used OEM part from us than to fix something that will fail mid-ride.
Wait, let’s add a real story to make this feel more authentic, because that’s what riders relate to. A few months back, a customer brought in a 1978 Honda CB750 he’d restored as a weekend project. He’d crashed it the night before, cracking the left engine cover, and was ready to buy a new one for $120. I told him about the aluminum epoxy trick, he went out, bought the high-temp epoxy we sell, followed the steps, and a week later he sent me a photo of the cover holding strong, and the bike back on the road. He saved $100, and that part’s going to last another 40 years if he takes care of it. That’s the energy we’re about at our parts supplier—helping riders keep their bikes running without overspending, not just pushing new parts.

If you’ve tried repairing a damaged motorcycle part and have questions, or you’re not sure if a repair is possible, our team is here to help. We carry all the tools, adhesives, and replacement parts you need for both small repairs and big projects, and we’re happy to walk you through steps over the phone or in person. Whether you’re a weekend mechanic with a side project or a casual rider who just wants to fix a small crack, we can connect you to the right products and advice to get the job done right.
Go Karting References
- Motorcycle Safety Foundation. (2021). Basic Motorcycle Maintenance: Repair vs. Replacement Guidelines.
- Aluminum Association. (2020). Repairing Aluminum Motorcycle Components: Best Practices for Welding and Adhesive Use.
- Society of Plastics Engineers. (2019. Thermoplastic Repair for Automotive and Motorcycle Bodywork: Material Compatibility and Repair Techniques.
- Brake Hose Manufacturer’s Association. (2022). Safety Standards for Brake Hose Repair and Replacement.
- International Motorcycle Parts Association. (2023. Sustainable Repair Practices for Motorcycle Parts: Reducing Waste and Extending Component Life.
J. Y. Montage Trade Industry Co., Ltd.
As one of the most professional motorcycle parts manufacturers and suppliers, we’re featured by quality products and good price. Please rest assured to wholesale bulk customized motorcycle parts from our factory. Welcome to contact us for quotation.
Address: No.47, Jianbao St., Changhua City, Changhua County 50060, Taiwan (R.O.C.)
E-mail: marketing@jy-montage.com
WebSite: https://www.sakamoto-tire.com/
